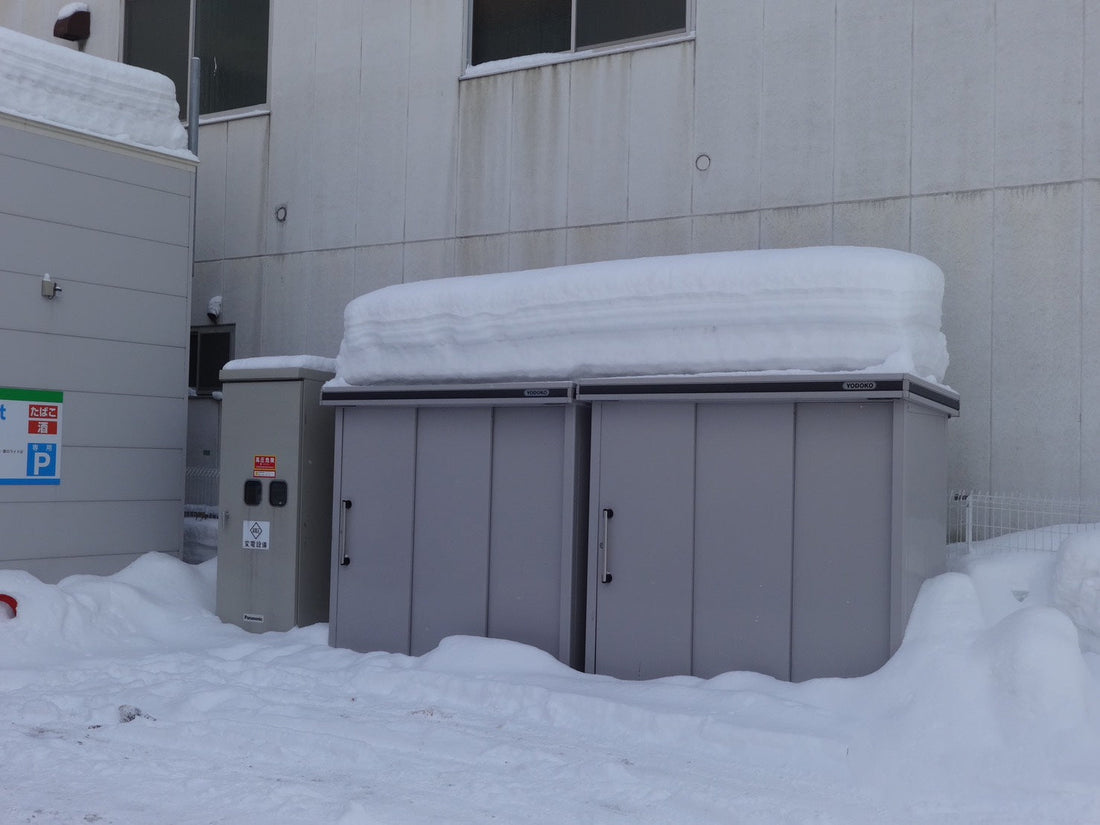
How to Keep Outdoor Storage Safe in Harsh Winter Conditions
Share
Winter brings snow, ice, wind, and freezing temperatures—all of which can take a toll on your outdoor storage setup. Whether you're storing garden tools, patio cushions, winter salt, or emergency gear, your outdoor cabinet needs to stand up to the elements without cracking, leaking, or rusting.
This comprehensive guide shares over a dozen expert strategies for winterizing outdoor storage, so your steel cabinets stay strong and your items stay safe—no matter how harsh the season gets.
1. Choose the Right Materials for Cold Weather
Not all outdoor cabinets are created equal. Many homeowners make the mistake of relying on plastic or wood—both of which perform poorly in extreme cold.
Why choose steel?
- Plastic can become brittle and crack
- Wood absorbs moisture and may expand, warp, or rot
- Steel, especially galvanized or powder-coated, maintains structural integrity in freezing temps
Look for:
- Reinforced frames to resist snow load
- UV-protected finishes to handle winter sun exposure
- Non-corrosive fasteners (zinc-coated screws, hidden rivets)
Pro Tip: Cabinets with double-walled doors and magnetic seals help insulate interior contents.

2. Elevate Your Storage Above Snow and Ice
Snowdrifts and melting ice can lead to water pooling at the base of your cabinet. That moisture promotes rust, structural damage, and even pests nesting underneath.
Prevent base corrosion with these steps:
- Install the cabinet on concrete blocks, treated wood pallets, or pavers
- Add a gravel or crushed-stone pad for drainage
- Use cabinets with built-in feet or adjustable legs to allow air circulation
Optional: Build a small platform frame using pressure-treated lumber and slope it slightly for water runoff.
3. Deep Clean and Weatherproof Before Winter
Prepping before winter begins is half the battle. A clean, sealed cabinet resists damage much more effectively.
Checklist before first freeze:
- Remove all contents and vacuum out dust, leaves, and bugs
- Wipe down interior and exterior with a mild detergent
- Inspect seams, hinges, and corners for gaps or rust spots
- Apply clear silicone caulk along any open seams
- Spray rust-inhibiting lubricant on hinges, bolts, and locks
Don't forget: Weatherstripping around the doors can be reinforced or replaced if cracked or loose.
4. Control Internal Moisture Year-Round
Even in sealed cabinets, internal condensation can form due to temperature swings.
Combat interior dampness with:
- Reusable silica gel canisters or moisture-absorbing tubs
- Charcoal packs for odor and moisture control
- Plastic bins with tight lids to organize tools or gear
- Ventilation slots that allow limited airflow without exposing to the elements
Bonus Tip: Avoid overstuffing the cabinet. Good airflow is key to preventing mildew and rust.
5. Organize Contents Based on Season and Access
When a blizzard hits or ice forms on your driveway, you don’t want to dig through layers of summer gear to find salt or a snow shovel.
Winter smart layout:
- Store winter tools (salt, snow shovels, sand) near the door
- Place lesser-used items like plant food, garden gloves, or patio cushions in back or top shelves
- Use labels, clear bins, or colored containers to quickly locate essentials
- Vacuum-seal or bag all fabrics to keep out moisture and pests
This level of organization makes your cabinet a winter-ready command center.

6. Reinforce Against Wind, Snow Load & Freeze-Thaw Cycles
Harsh weather does more than just wet your tools—it can physically move or break down poorly protected units.
Add physical reinforcement with:
- Anchoring kits bolted to concrete or patio slabs
- Bracing bars or crossbeams inside the cabinet for added rigidity
- Positioning cabinets next to house walls, fences, or sheds for wind protection
- Placing weighted materials (like sandbags or cinder blocks) inside bottom shelves for extra ballast
Also consider: Installing a slanted top or snow guard to reduce ice buildup and prevent roof warping.
7. Perform Monthly Mid-Winter Maintenance
A winterized cabinet still needs occasional attention—especially after heavy storms or thaws.
Monthly check-up tips:
- Open cabinet on sunny days to let in fresh air
- Check seals for freezing, gaps, or weather damage
- Replace any moisture absorbers that are saturated
- Remove any snow from the top to avoid structural strain
- Test locks and hinges to ensure they haven’t frozen
This maintenance takes 10 minutes and could extend your cabinet’s lifespan by years.
8. Prepare for Spring Melt
Don’t let the end of winter surprise you with floods or corrosion.
Before the thaw:
- Clear snow from around the cabinet base
- Use a broom to clear top snow loads before melting starts
- Start transitioning winter-only items to rear shelves
- Disinfect interior surfaces using vinegar or antibacterial spray
Getting a head start on spring prep also helps prevent mold growth and rodent nesting.
9. Use Cabinet for Emergency Winter Gear
In remote homes or during extreme storms, a secure outdoor cabinet can be part of your emergency plan.
What to store:
- Emergency blanket, flashlight, batteries, hand warmers
- Backup snow salt or tire traction pads
- Small toolkit and first aid kit
Choose a section of your cabinet for just-in-case supplies and mark it clearly.
Final Thoughts
Winter doesn’t have to destroy your outdoor storage setup. With the right strategies—steel construction, elevation, insulation, weatherproofing, and seasonal upkeep—your cabinet can remain functional, dry, and secure through snowstorms, ice, and weeks of freezing temps.
Your tools and supplies deserve a winter home that’s built to last. Take the time to prepare now, and your outdoor storage will serve you well—not just this season, but for years to come.

