

Steel Shed with Shelving: The Ultimate Guide to Maximizing Storage Space
A steel shed without a strategic shelving plan isn't a storage solution; it's just an expensive box for your floor clutter. Most homeowners invest in a high-quality structure only to watch it become an inaccessible pile of tangled garden hoses, rusted tools, and bowing plastic bins. If you want to truly unlock the potential of your steel shed with shelving, you have to stop treating organization as an afterthought. Cheap, freestanding units often fail under pressure, leaving your valuable equipment vulnerable to damage and the damp floor.
We understand the frustration of losing hours searching for a specific tool in a crowded, disorganized space. You deserve a setup that works as hard as you do. This guide will show you how to transform your metal building into a high-performance hub using Japanese-engineered precision and integrated storage systems. You'll learn how to maximize every inch of vertical space, protect your gear from ground-level moisture, and implement a shelving strategy that matches the 20-year structural warranty of your shed. It's time to stop digging through piles and start enjoying a perfectly organized workspace.
Key Takeaways
- Discover why the vertical storage principle is essential for protecting your equipment from floor-level moisture and rust.
- Learn the risks of drilling into galvanized walls and why integrated track systems are superior to freestanding plastic units.
- Master your layout by mapping workflows and keeping a low center of gravity for your steel shed with shelving.
- Get a clear roadmap for installing Yodoko accessories that maintain the precision and structural integrity of your LMDS or ESF model.
- Understand how choosing Japanese-engineered shelving ensures your organization system lasts as long as your 20-year shed warranty.
Understanding the Value of a Steel Shed with Shelving
A steel shed with shelving isn't just a place to hide your lawnmower; it's a strategic extension of your home's efficiency. When you invest in a premium metal building, your primary goal is long-term protection for your tools and equipment. However, many owners overlook the interior architecture, leaving their high-value power tools and electronics exposed on the floor. An organized workspace provides significant psychological benefits, replacing the stress of a "junk room" with the mental clarity of a professional workshop. You won't spend twenty minutes digging through a pile for a single wrench when everything has a designated home. By utilizing the vertical storage principle, you transform a cluttered box into a high-functioning equipment hub that preserves the life of your gear.
The Problem with Floor-Based Storage
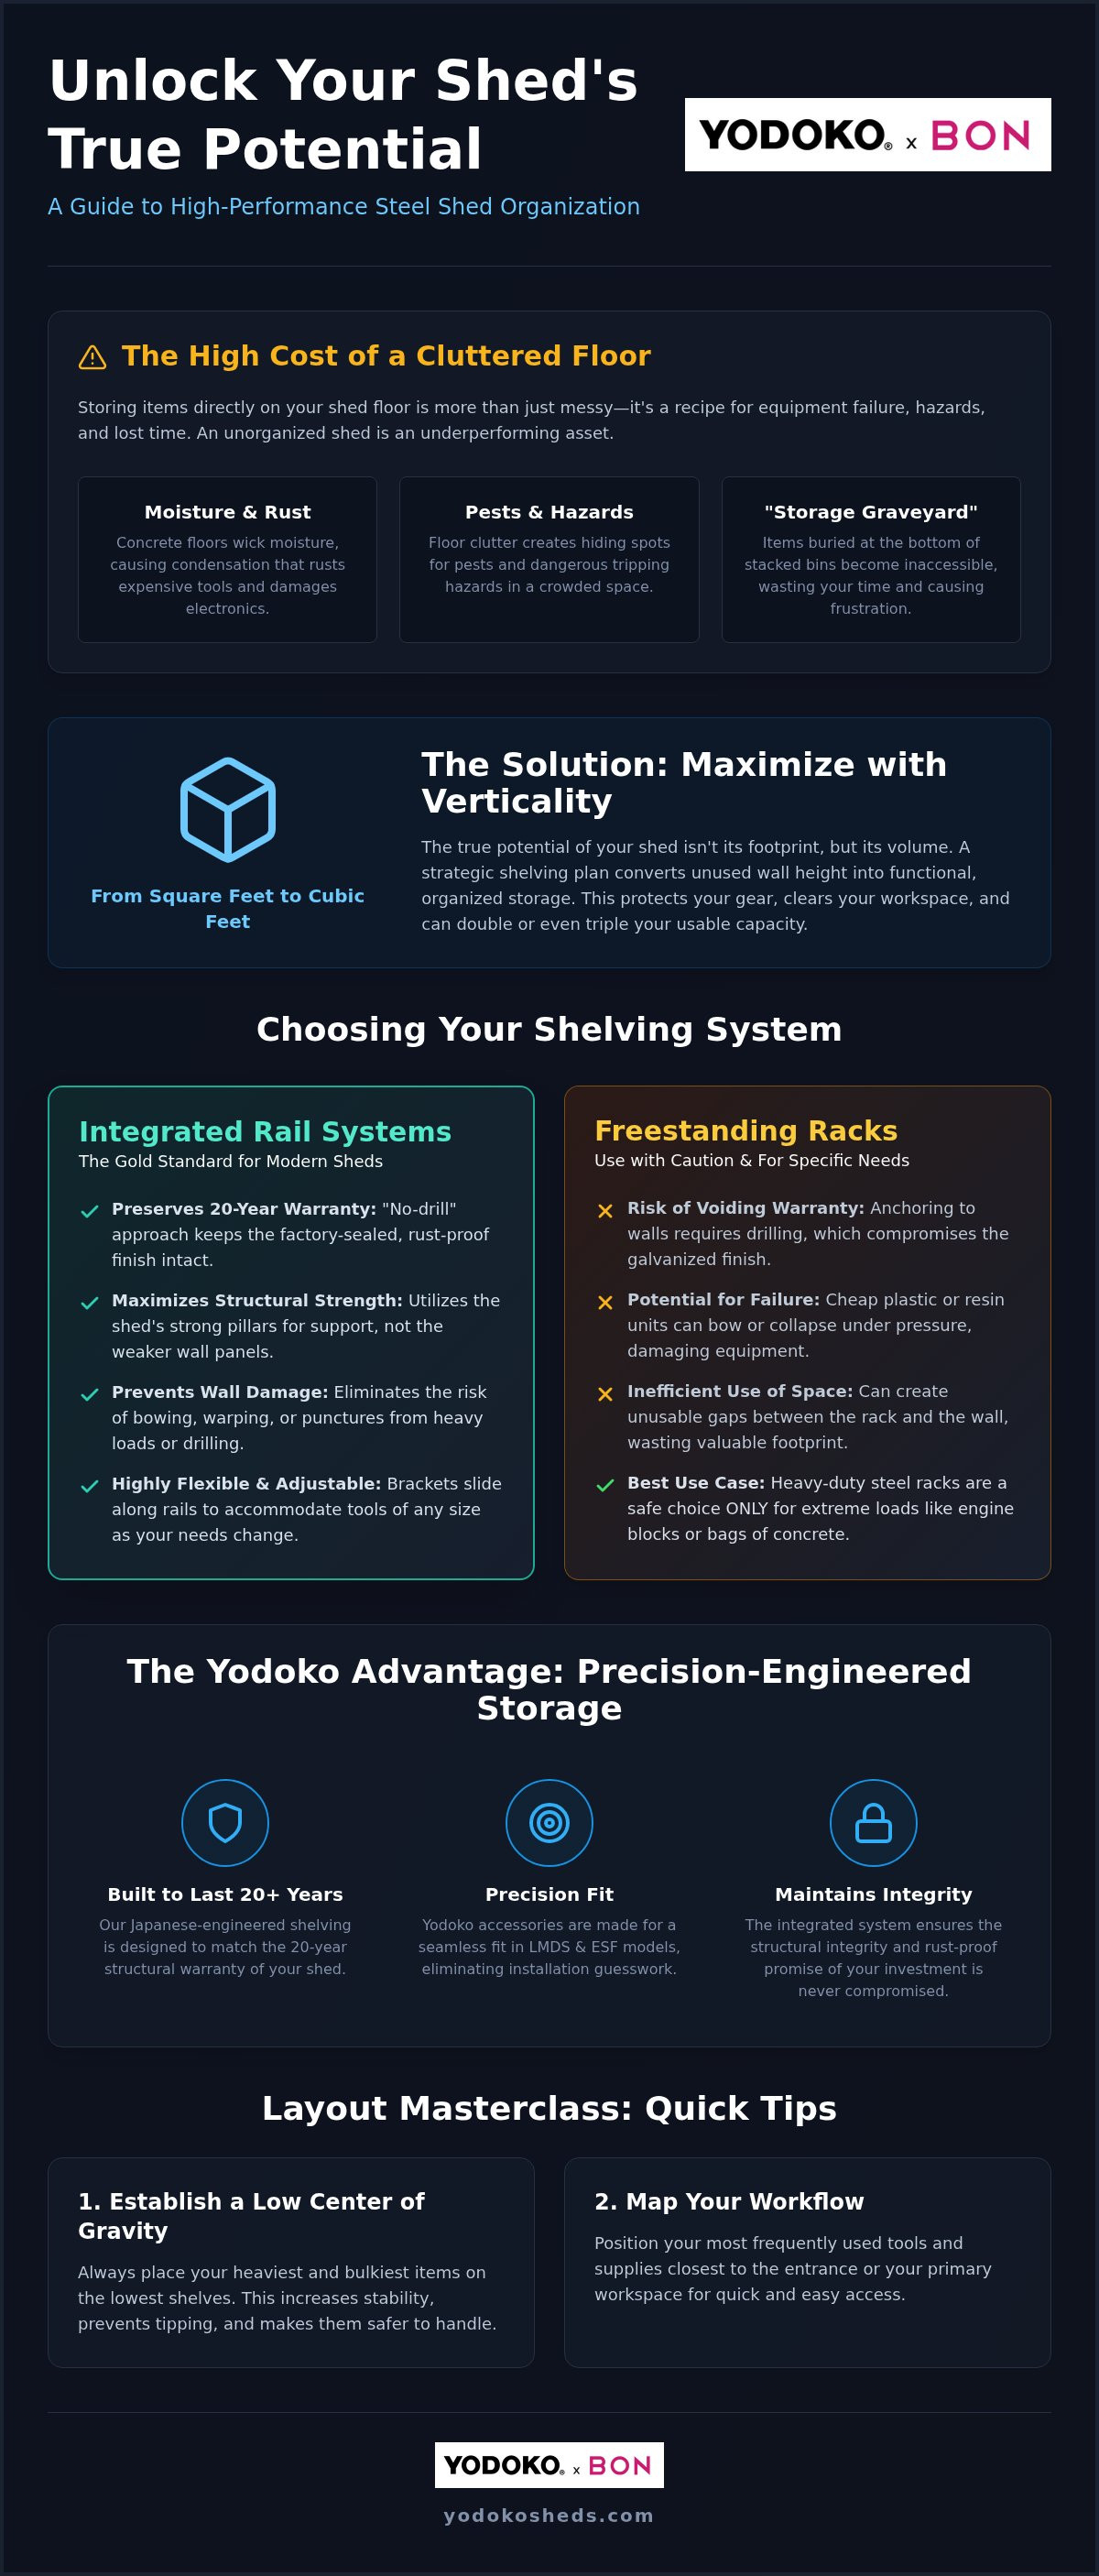
Storing items directly on the floor is a recipe for premature equipment failure. Concrete and metal floors can wick moisture, leading to condensation that causes rust on your most expensive saws and drills. Beyond moisture, floor-level storage creates a "storage graveyard." This happens when you stack bins on top of each other; the item you need is inevitably at the bottom, making it effectively inaccessible. Cluttered floors also invite pests to nest in dark, undisturbed corners and create significant tripping hazards. If you can't see your floor, you can't inspect the structure for potential issues, which compromises the 20-year lifespan of your investment. Keeping the floor clear ensures proper airflow and makes cleaning a five-minute task rather than a weekend project.
Maximizing Your Footprint with Verticality
When you buy a steel shed, you're paying for the footprint, but you're getting the volume. Most owners only think in square feet, yet the true potential lies in the cubic feet. By exploring different types of shelving, you can double or even triple your usable storage area without increasing the building's external size. Vertical storage efficiency is the practice of converting unused wall height into functional capacity to optimize the ratio of stored goods to total cubic volume. Moving items to the walls keeps the center of the room clear for movement and larger machinery like snowblowers or bikes. A well-planned steel shed with shelving ensures that every inch of the structure provides maximum utility while keeping your most delicate electronics away from ground-level humidity spikes and accidental spills.
Evaluating Shelving Systems: Integrated vs. Freestanding
Choosing the right internal architecture for your steel shed with shelving is a decision that affects both safety and the lifespan of your building. Many owners make the mistake of buying generic bolt-on kits from a local hardware store. These often require you to drill directly into the wall panels. In a high-quality galvanized structure, every hole you drill is a potential entry point for moisture and oxidation. This compromises the rust-proof finish that makes a japanese steel shed so durable. Instead, you must evaluate whether your storage needs are best met by integrated systems that work with the shed's frame or by independent racks that stand on their own.
The Case for Integrated Rail Systems
Integrated track-and-rail systems are the gold standard for modern steel sheds. These systems utilize the existing structural pillars of the shed to support weight, which prevents the wall panels from bowing or warping under pressure. Because they don't require drilling, they preserve the factory-sealed finish of your building. This "no-drill" approach is essential for maintaining a 20-year structural warranty. These systems also offer incredible flexibility. You can slide brackets along the rails to adjust for different tool heights as your collection grows. If you're looking for a seamless fit, exploring Yodoko Shed Accessories will show you how integrated design eliminates the guesswork of installation.
When to Use Freestanding Heavy-Duty Racks
While integrated systems are perfect for most tools, some items require the raw load-bearing capacity of a freestanding unit. If you're storing heavy engine parts, large bags of concrete, or industrial machinery, a standalone steel rack is often the safer choice. These units carry their weight directly to the floor, bypassing the wall structure entirely. When selecting these, prioritize steel over resin. Plastic shelves tend to sag and deform during hot summer months, which can lead to spills or damaged gear. Safety is paramount here. You must ensure these units are perfectly level and anchored to prevent tipping. Following professional standards for safe shelving installation ensures that your heavy-duty storage remains stable and secure for years to come. By combining integrated wall storage for smaller items with a few heavy-duty floor racks, you create a balanced system that maximizes every cubic inch of your shed.
How to Design Your Steel Shed Layout for Maximum Efficiency
Designing a layout for your steel shed with shelving requires more than just eyeballing the space; it demands a blueprint for efficiency. A well-engineered shed is only as good as the system inside it. If you place your lawnmower in the back corner and stack heavy soil bags on top shelves, you're creating a recipe for frustration and potential injury. You must map your workflow by categorizing items based on how often you use them. Seasonal gear like holiday lights or snow shovels should occupy the highest or deepest corners, while your daily gardening tools or DIY supplies need to be front and center. This strategic approach ensures your shed remains an organized powerhouse rather than a chaotic catch-all.
Ergonomics play a vital role in a high-performance storage system. Professionals refer to the "Golden Zone" as the area between your shoulders and hips. This is where you should store your most frequently used heavy tools, such as drills, circular saws, or toolboxes. Storing these items at this height minimizes strain on your back and makes it effortless to grab what you need. While you maximize your vertical space, always remember to keep the center of gravity low. Placing your heaviest items on the bottom shelves or directly on the floor doesn't just protect the shelving; it increases the overall stability of the structure during high winds or seismic activity.
Zoning Your Storage Space
Effective organization relies on clear zoning. By dividing your shed into specific functional areas, you prevent "clutter creep" from taking over your workspace. Consider these three essential zones:
- The Work Zone: Located near the door or a workbench, this area holds your primary hand tools, gloves, and active project materials.
- The Deep Storage Zone: This is for bins of seasonal decor, camping gear, or documents. These go on the highest shelves or at the very back of the shed.
- The Bulk Zone: Dedicated floor space for oversized items like lawnmowers, bicycles, or pressure washers. Always keep a clear path from the door to these items.
Accounting for Structural Integrity
When you're loading up a heavy duty steel shed, you must balance the weight across all structural pillars. Concentrating all your heavy equipment on one wall can lead to panel bowing or frame stress over time. Distributing the load evenly ensures that the shed maintains its shape and performance for the full 20-year warranty period. Safety is a non-negotiable part of this process. Following the guidelines in an official safety manual regarding load ratings will help you avoid overloading individual brackets. Additionally, leave a small gap of about an inch between your shelves and the wall panels. This simple step encourages airflow, which is critical for preventing condensation and protecting your steel shed with shelving from internal moisture buildup.
Step-by-Step Guide: Installing Shelving in Your Steel Shed
Installing a high-quality steel shed with shelving is a straightforward process when you use Japanese-engineered integrated systems. Unlike generic kits that require invasive drilling, these accessories are designed to work with the existing structure. You don't need a professional contractor to get this right. It's a weekend project that pays dividends in organization and accessibility for years. By following a methodical approach, you ensure that your storage system is as durable and reliable as the shed itself.
Preparation and Safety
Before you begin, ensure the shed floor is perfectly level. An uneven foundation puts unnecessary stress on the frame, which can lead to misaligned tracks and difficult assembly. Clear your workspace entirely so you have room to move large shelf plates without obstruction. Safety is a priority during this phase. Always wear protective gloves and eye protection when handling galvanized steel components to avoid cuts from sharp edges. You should also verify that your prefab steel shed is properly anchored to its concrete base. Adding several hundred pounds of weight to the walls without secure anchoring is a safety risk you can't afford to take.
The Installation Process
The beauty of integrated systems lies in their precision. Follow these three steps to secure your storage hub:
- Step 1: Align the vertical rails. These rails are the backbone of your steel shed with shelving. They should hook or bolt directly into the pre-punched holes in the shed frame. This ensures the weight is carried by the structural pillars rather than the thin wall panels.
- Step 2: Secure the support brackets. Place these at intervals that suit your specific storage needs. If you're storing tall items like leaf blowers or tall bins, leave more space between the middle and bottom shelves. The brackets should click into place with a satisfying, secure fit.
- Step 3: Install the shelf plates. Snap the plates into the brackets and use a spirit level to confirm everything is horizontal. Once installed, apply a small amount of weight to each shelf to ensure the brackets are fully seated before you begin your final organization.
A well-installed system protects your tools and maximizes your investment. If you want to ensure a perfect fit for your LMDS or ESF model, browse our selection of Yodoko Shed Accessories to find the right components for your specific build.
The Yodoko Advantage: Integrated Shelving for LMDS and ESF Models
Investing in a steel shed with shelving from Yodoko means choosing a system where every component is engineered to the same rigorous standards as the building itself. Most generic storage solutions fail because they are treated as an afterthought, but our accessories are part of the structural blueprint. When you install Yodoko shelving, you aren't just adding a surface; you're utilizing a system that matches our 20-year structural warranty. This level of synergy is only possible through Japanese-engineered precision. Our components fit with a flush finish that maintains the fire-proof and rust-proof integrity of the entire unit, ensuring your organization system doesn't become the "weak link" in your storage strategy.
The long-term value of galvanized steel shelving far outweighs the initial savings of resin or plastic alternatives. While plastic units often warp or degrade within five years due to heat and weight stress, our high-gauge steel accessories remain rigid and reliable for decades. This durability is essential for maintaining the safety standards we've discussed, such as keeping a low center of gravity and preventing wall bowing. By choosing engineered accessories, you protect the factory-sealed finish of your shed and avoid the corrosion risks associated with third-party, "drill-in" kits.
Shelving Designed for the LMDS Series
The YODOKO LMDS Steel Shed is a heavy-duty powerhouse, and its shelving options reflect that strength. These units feature an anti-corrosive coating that complements the galvanized steel construction of the shed walls. Because the LMDS is a hurricane-rated structure, the integrated track-and-rail shelving is designed to distribute weight directly into the reinforced frame. This prevents the panels from vibrating or shifting during extreme weather. Each shelf is rated for specific heavy-duty weight limits, allowing you to store bulky equipment without fear of structural failure. This integration supports the vertical storage efficiency required to keep your floor clear and your tools accessible.
Maximizing Value with Yodoko Accessories
Your organization strategy should extend beyond simple horizontal surfaces. We offer a range of Shed Accessories designed to turn your YODOKO ESF Steel Shed or LMDS model into a fully customized hub. From specialized anchoring kits that enhance stability to various bracket configurations, these tools are built for a lifetime of use. Buying engineered accessories eliminates the frustration of mismatched parts and the safety hazards of unstable racks. It's a one-time investment that ensures your workspace remains professional, safe, and perfectly organized for the next twenty years. Explore our full catalog to find the specific components that will transform your shed into a high-performance storage system.
Build Your Ultimate Organized Workspace
Transforming your steel shed with shelving into a high-performance hub is about more than just tidying up. It's an investment in your equipment's longevity and your own productivity. By prioritizing vertical storage and using integrated systems, you protect your valuable tools from ground-level moisture while maximizing every cubic inch of space. You've learned how Japanese engineered precision and heavy-duty materials provide a foundation that freestanding plastic units simply can't match.
Your shed is a hurricane-rated structure built to last for decades, and your organization system should be just as resilient. Our accessories are designed to integrate seamlessly with the frame, maintaining the rust-proof integrity and supporting the 20-year structural warranty you rely on. Don't let floor clutter compromise your workspace efficiency any longer. It's time to experience the difference that professional-grade storage makes.
Explore Yodoko Steel Shed Accessories and Shelving Kits today and start building the organized powerhouse you deserve. Your perfectly optimized shed is just a few brackets away.
Frequently Asked Questions
Can I add shelving to any metal shed after it is built?
You can add shelving to most metal sheds after assembly, but the process is much simpler if the structure includes pre-punched mounting points. Yodoko sheds are designed with internal pillars that accommodate integrated track systems at any time. This allows you to upgrade your storage capacity as your tool collection grows without needing to disassemble the building or perform complex structural modifications.
How much weight can a standard steel shed shelf hold?
The weight capacity of a steel shed with shelving depends on whether you use integrated tracks or freestanding units. Yodoko shelving accessories are engineered for heavy-duty use, utilizing the shed's structural frame to support significant loads. You should always check the specific load ratings for your LMDS or ESF model to ensure you don't exceed the manufacturer's recommendations for individual brackets and plates.
Do I need to drill holes in my shed walls to install shelves?
You don't need to drill holes in your shed walls if you use an integrated track-and-rail system. Drilling into galvanized steel can strip away the protective coating and invite rust, which compromises the structure's longevity. Our system hooks directly into the existing frame, preserving the factory-sealed finish and ensuring your 20-year structural warranty remains fully intact while providing a secure mounting point.
Are steel shelves better than plastic or wood shelves for an outdoor shed?
Steel shelving is the superior choice for outdoor environments because it matches the durability of the shed itself. Unlike plastic, steel won't bow or sag under heavy weight or high summer temperatures. Wood shelves can absorb moisture, leading to rot and pest issues. Selecting galvanized steel ensures your organization system lasts as long as your building without requiring constant replacement.
How do I prevent my steel shelves from rusting in humid climates?
Preventing rust starts with choosing accessories that feature a high-quality galvanized finish and anti-corrosive coatings. You should also ensure there is adequate airflow behind the shelves by leaving a small gap between the storage unit and the wall panel. This simple step prevents condensation from becoming trapped against the metal, which is the primary cause of oxidation in humid climates.
Can I install shelving in a hurricane-rated shed without affecting the rating?
Installing integrated shelving will not affect the hurricane-rated engineering of your shed. These systems are designed to distribute weight evenly across the structural pillars rather than putting stress on individual wall panels. By avoiding invasive drilling and using factory-approved accessories, you maintain the structural integrity required to withstand extreme wind loads while maximizing your internal storage space.
What is the best way to organize heavy garden equipment on steel shelving?
The most efficient way to organize heavy equipment is to keep the heaviest items on the lowest shelves to maintain a low center of gravity. This improves the overall stability of your steel shed with shelving. Store frequently used tools at waist height for better ergonomics and place seasonal or lighter items on the top tiers to keep your primary workspace clear.
Does Yodoko offer different shelving sizes for the ESF and LMDS models?
Yodoko provides specific shelving accessories tailored for both the ESF and LMDS model lines. Because these sheds have different dimensions and frame configurations, using the correct model-specific accessories ensures a precision fit. This Japanese-engineered approach guarantees that every shelf aligns perfectly with the structural pillars, providing maximum stability and a professional finish for your specific storage unit.